Migrating the RAID Level of a Virtual Drive
ATTENTION Be sure to back up the data on the virtual drive before you change the RAID level.
Follow these steps to change the RAID level of the virtual drive with the Modify Drive Group wizard:
|
1. |
Click the Logical tab in the left panel of the MegaRAID Storage Manager window. |
|
3. |
Either select Go To > Drive Group > Modify Drive Group on the menu bar, or right-click the virtual drive icon to access the Modify Drive Group wizard. |
The Modify Drive Group wizard appears.
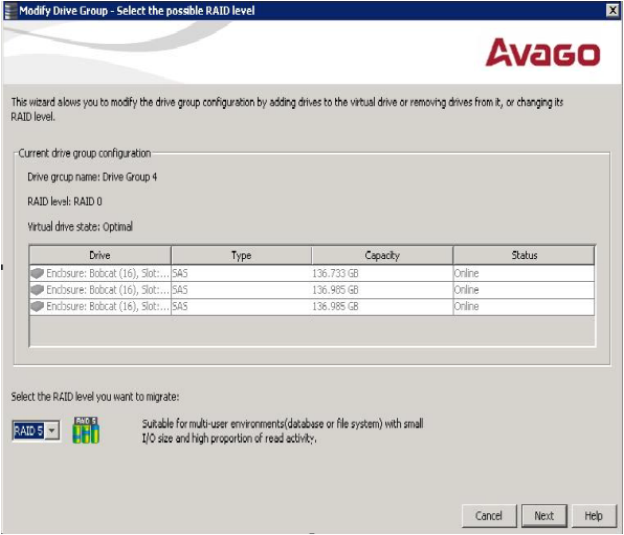
Figure 72. Modify Drive Group Wizard Dialog
|
4. |
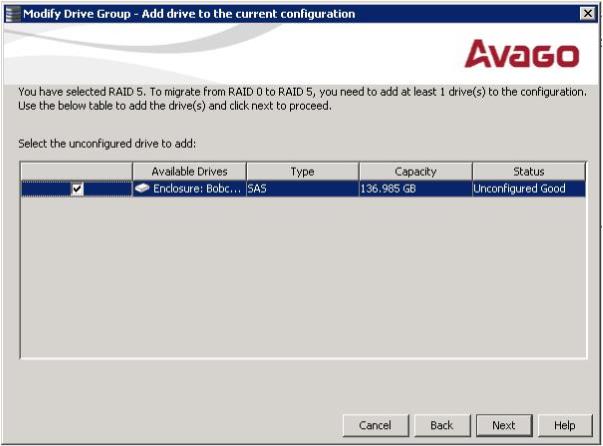
On the Modify Drive Group Wizard dialog, select the RAID level to which you want to change ("migrate") the drive group to, and click Next. |
Figure 73. Modify Drive Group - Add drive to the current configuration Screen
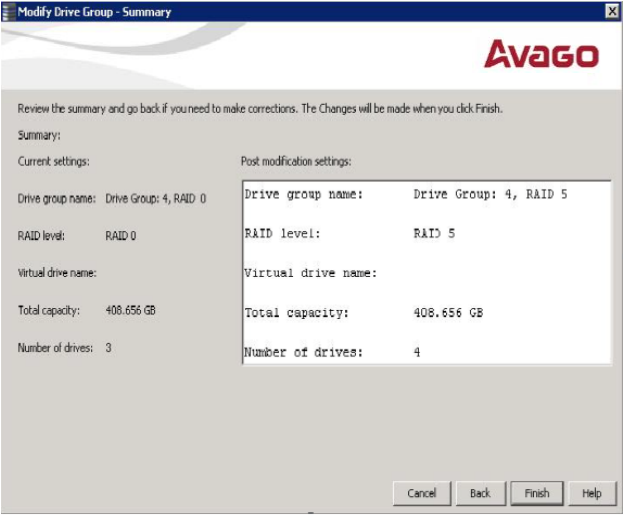
The Modify Drive Group – Summary window appears. This window shows the current settings and what the settings will be after the drives are added.
Figure 74. Modify Drive Group - Summary Screen
You can click Back if you need to change any selections.
|
7. |
Click Finish to accept the changes. |
|
8. |
Click Yes to accept and complete the migration to the new RAID level. |
The operation begins on the virtual disk. To monitor the progress of the RAID level change, select Manage > Show Progress in the menu bar.


