Creating a Virtual Drive Using a Simple Configuration
NOTE The IT controller does not support RAID. All references to virtual drives and RAID action do not apply to IT controllers. The Create Configuration feature is permitted only to create a IR 1 or IR 2 virtual drive.
Perform these steps to create a new storage configuration in a simple configuration mode.
|
|
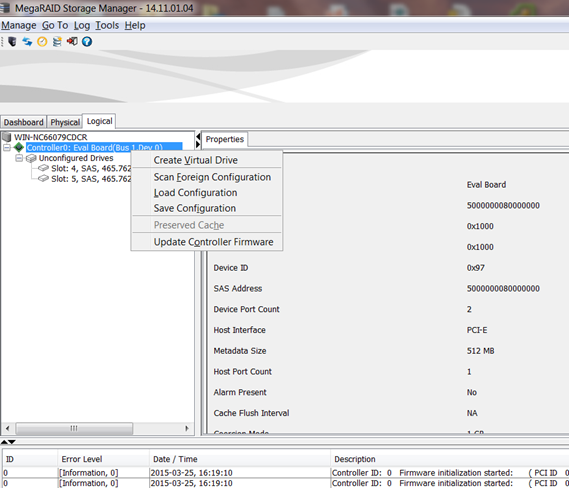
Right-click the controller node in the device tree in the left frame of the MegaRAID Storage Manager main menu, and select Create Virtual Drive. |
|
|
Select the controller node, click Go To, and select Operations > Create Virtual Drive in the menu bar, as the following figure shows. |
Figure 22. Create Virtual Drive Menu
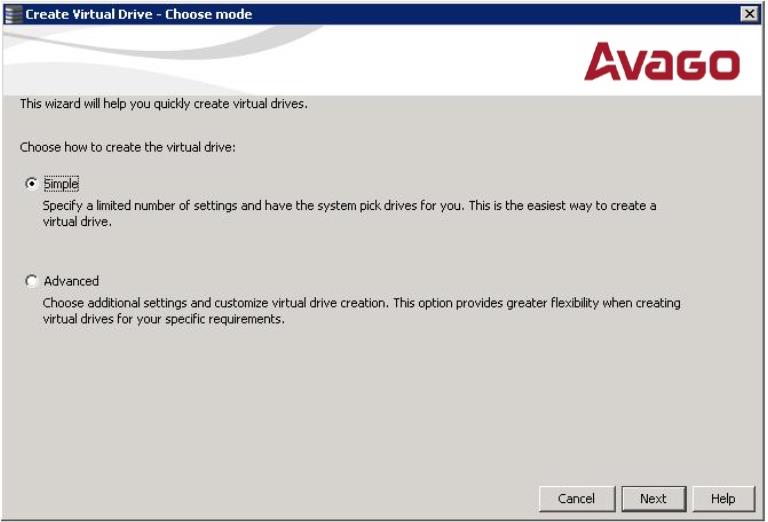
The dialog for the configuration mode (Simple or Advanced) appears, as shown in the following figure.
Figure 23. Create Virtual Drive – Choose mode Dialog
|
2. |
Select the Simple radio button, and click Next. |
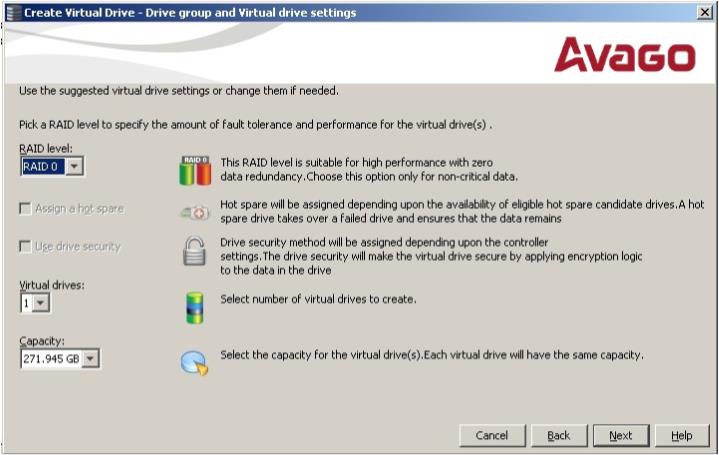
Figure 24. Create Virtual Drive – Drive group and Virtual drive settings
|
4. |
Select the Assign a hot spare check box to assign a dedicated hot spare to the new virtual drive. |
Each virtual drive has the same capacity.
|
6. |
Click Next. |
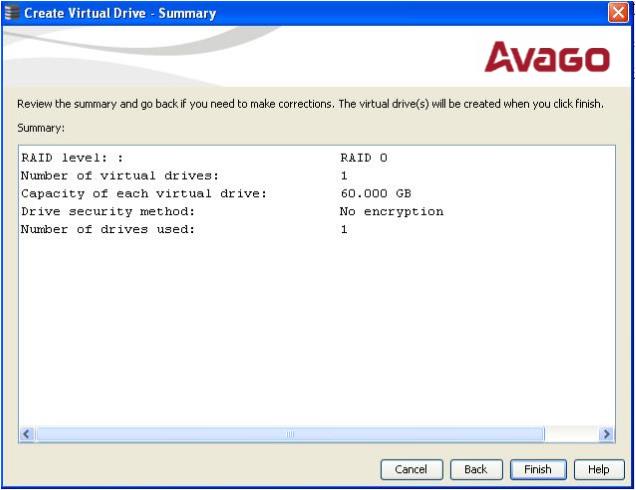
The Create Virtual Drive – Summary window appears, as the following figure shows. This window shows the features of the simple configuration.
Figure 25. Create Virtual Drive – Summary Window
|
7. |
Click Back to return to the previous window to change any selection.orClick Finish to accept and complete the configuration. |
The new virtual drive is created after you click Finish. After the configuration is completed, a dialog notifies you that the virtual drives were created successfully.


