Указатель
Что такое DosBox?
 |
DOSBox — эмулятор MS-DOS для PC, создающий DOS-окружение, необходимое для запуска старых программ и игр. |
Это позволяет запускать DOS игры в операционных системах, не поддерживающих или не полностью поддерживающих DOS-программы, в том числе на современных компьютерах, на которых старые программы могут не работать или работают с ошибками.
Эмулятор имеет открытый исходный код и доступен для Linux, FreeBSD, Windows, OS X, iOS, OS/2, BeOS, KolibriOS, Symbian OS, QNX, Android. Также Windows-версия при помощи HX DOS Extender запускается под чистым DOS — таким образом, DOS эмулируется под DOS.
Версия 0.74-3 поддерживает 1139 игр. Распространяется бесплатно под лицензией GNU General Public License.
DOSBox — Википедия (wikipedia.org)
Установка DOSBox
Скачайте DOSBox для своей операционной системы. Далее приведена инструкция для установки DOSBox версии 0.74-3 в операционной системе Windows 11.
Запустите инсталлятор DOSBox0.74-3-win32-installer.exe и следуйте инструкциям мастера установки.
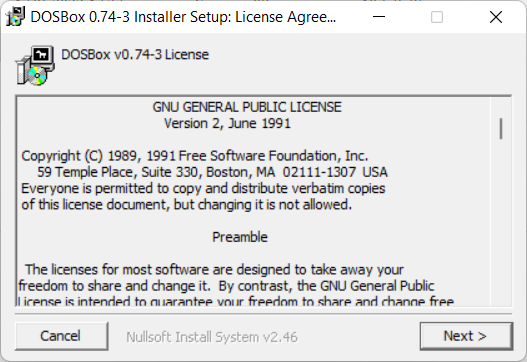
Next.

Next.
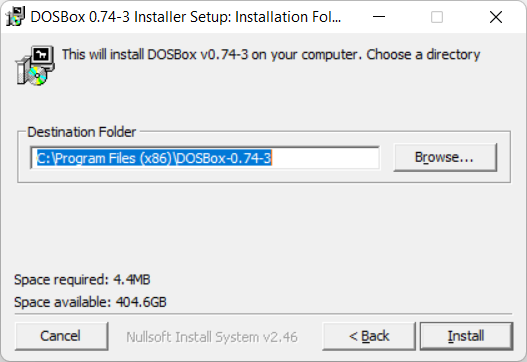
Инсталлятор предлагает выполнить установку в директорию:
C:\Program Files (x86)\DOSBox-0.74-3
Install.
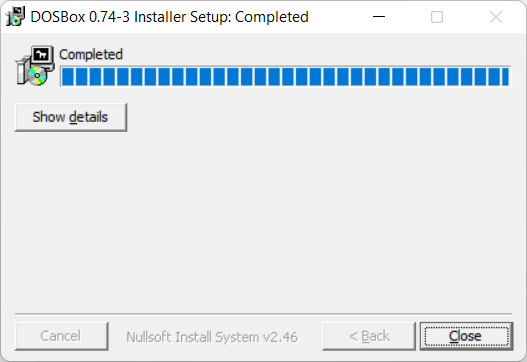
Close. Установка завершена.
Настройка DOSBox
Без настроек DOSBox прекрасно запускается и работает со множеством игр. Однако, начальные настройки могут вам по какой-то причине не подойти. В этом случае настройки можно "подкрутить".
Заходим в каталог с установкой.
C:\Program Files (x86)\DOSBox-0.74-3
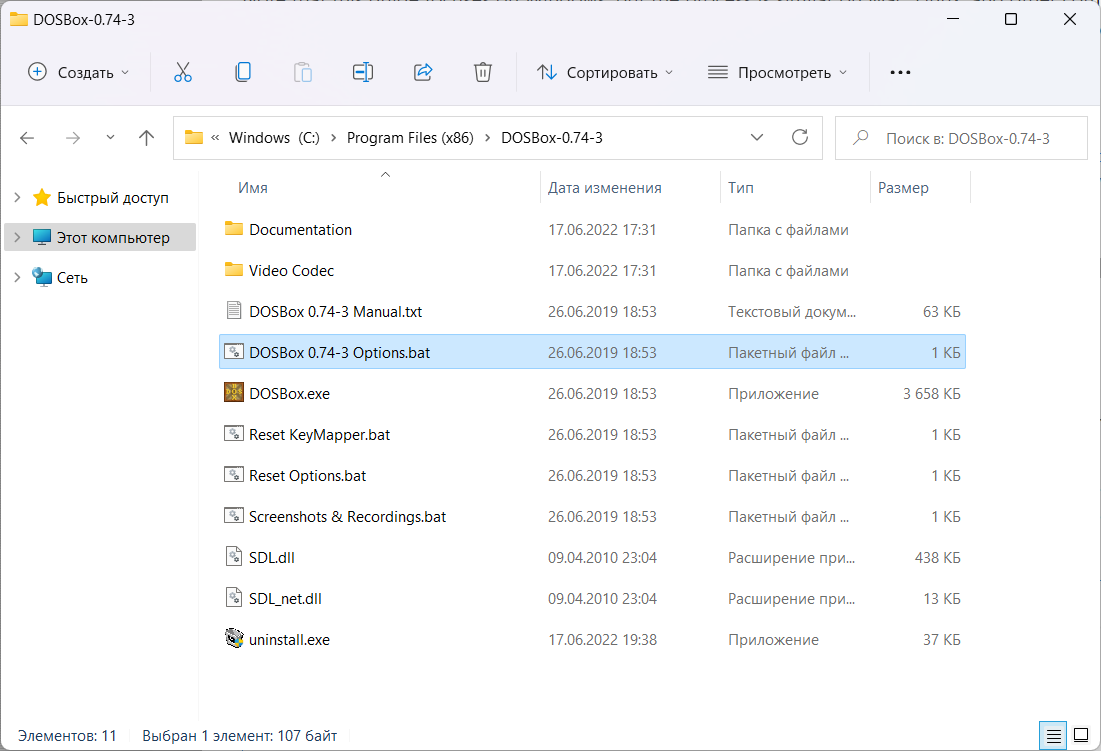
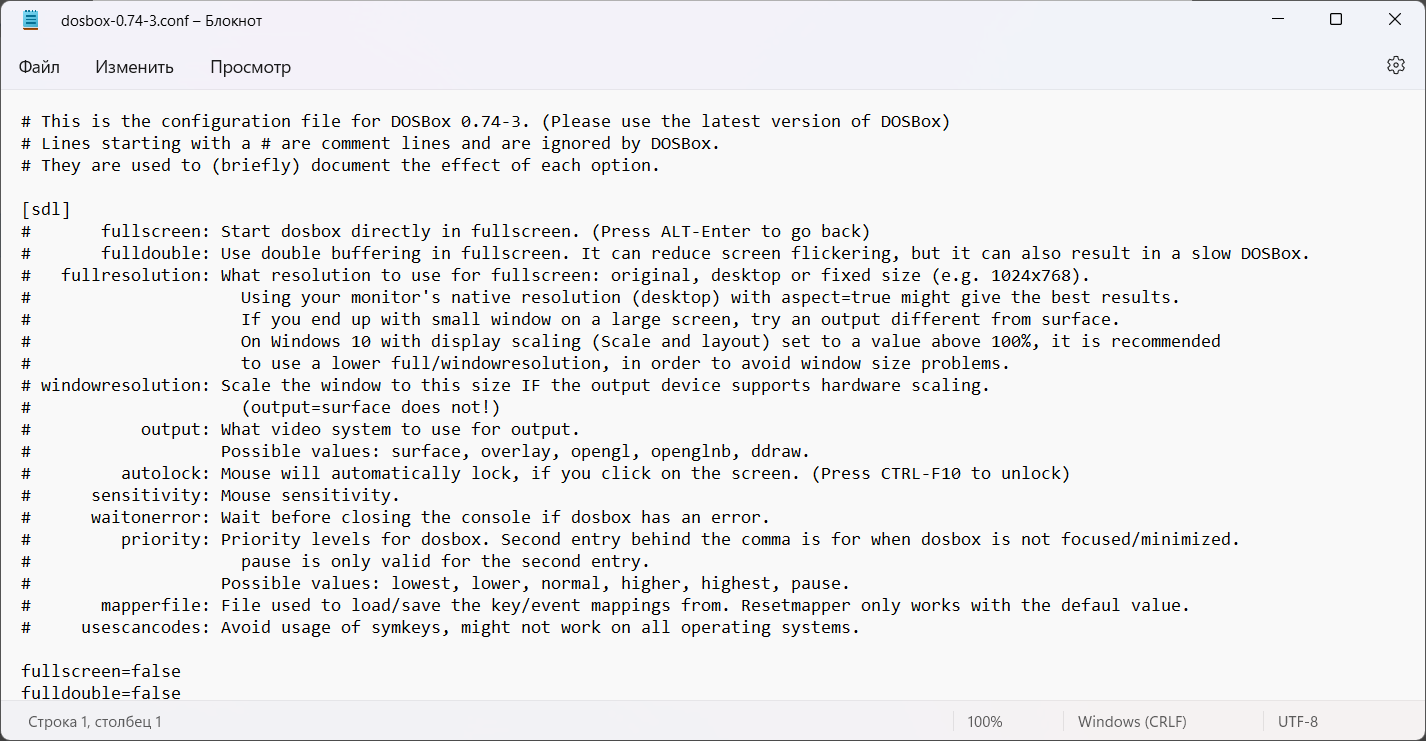
Для создания файла конфигурации DOSBox запускаем DOSBox 0.74-3 Options.bat. Скрипт создаст файл конфигурации и откроет его в блокноте. Файл конфигурации доступен по адресу:
C:\Users\%username%\AppData\Local\DOSBox\dosbox-0.74-3.conf
Конфигурация по умолчанию
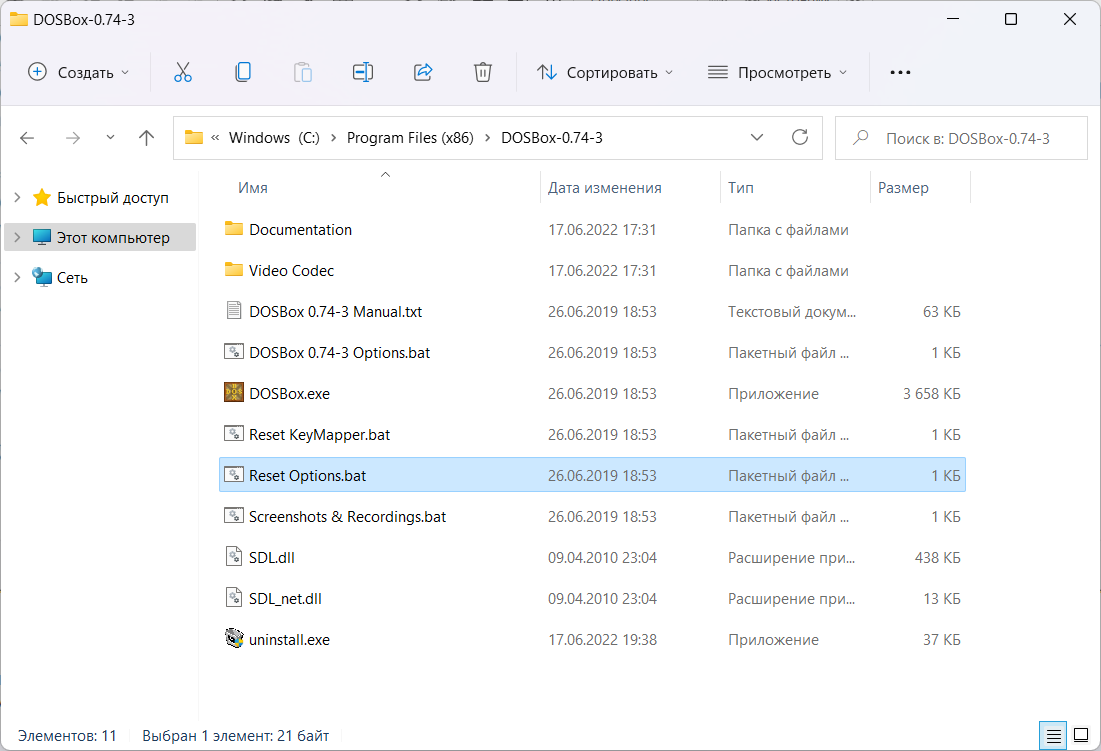
Если файла конфигурации нет, то при первом запуске DOSBox или скрипта настроек он создастся. Поэтому, если вы что-то напортачили в конфигурации, то можно просто удалить файл и DOSBox заново его создаст. Для сброса настроек конфигурации можно выполнить команду:
DOSBox.exe -resetconf
Или запустить скрипт Reset Options.bat.
Готовые конфигурации
Вы можете воспользоваться одной из готовых конфигурации DOSBox. Запустите DOSBox 0.74-3 Options.bat и внесите изменения в конфигурацию:
-
Full screen
# This is the configurationfile for DOSBox 0.74. (Please use the latest version of DOSBox)
# Lines starting with a # are commentlines and are ignored by DOSBox.
# They are used to (briefly) document the effect of each option.

[sdl]
#       fullscreen: Start dosbox directly in fullscreen. (Press ALT-Enter to go back)
#       fulldouble: Use double buffering in fullscreen. It can reduce screen flickering, but it can also result in a slow DOSBox.
#   fullresolution: What resolution to use for fullscreen: original or fixed size (e.g. 1024x768).
#                     Using your monitor's native resolution with aspect=true might give the best results.
#                     If you end up with small window on a large screen, try an output different from surface.
# windowresolution: Scale the window to this size IF the output device supports hardware scaling.
#                     (output=surface does not!)
#           output: What video system to use for output.
#                   Possible values: surface, overlay, opengl, openglnb, ddraw.
#         autolock: Mouse will automatically lock, if you click on the screen. (Press CTRL-F10 to unlock)
#      sensitivity: Mouse sensitivity.
#      waitonerror: Wait before closing the console if dosbox has an error.
#         priority: Priority levels for dosbox. Second entry behind the comma is for when dosbox is not focused/minimized.
#                     pause is only valid for the second entry.
#                   Possible values: lowest, lower, normal, higher, highest, pause.
#       mapperfile: File used to load/save the key/event mappings from. Resetmapper only works with the defaul value.
#     usescancodes: Avoid usage of symkeys, might not work on all operating systems.

fullscreen=true
fulldouble=false
fullresolution=original
#fullresolution=1280x800
windowresolution=1280x800
#output=openglnb
output=surface
autolock=true
sensitivity=100
waitonerror=true
priority=higher,normal
mapperfile=mapper-0.74.map
usescancodes=true
#hwscale=2.0

[dosbox]
# language: Select another language file.
#  machine: The type of machine tries to emulate.
#           Possible values: hercules, cga, tandy, pcjr, ega, vgaonly, svga_s3, svga_et3000, svga_et4000, svga_paradise, vesa_nolfb, vesa_oldvbe.
# captures: Directory where things like wave, midi, screenshot get captured.
#  memsize: Amount of memory DOSBox has in megabytes.
#             This value is best left at its default to avoid problems with some games,
#             though few games might require a higher value.
#             There is generally no speed advantage when raising this value.

language=
machine=svga_s3
captures=capture
memsize=16

[render]
# frameskip: How many frames DOSBox skips before drawing one.
#    aspect: Do aspect correction, if your output method doesn't support scaling this can slow things down!.
#    scaler: Scaler used to enlarge/enhance low resolution modes.
#              If 'forced' is appended, then the scaler will be used even if the result might not be desired.
#            Possible values: none, normal2x, normal3x, advmame2x, advmame3x, advinterp2x, advinterp3x, hq2x, hq3x, 2xsai, super2xsai, supereagle, tv2x, tv3x, rgb2x, rgb3x, scan2x, scan3x.

frameskip=0
aspect=false
#scaler=normal3x
scaler=normal

[cpu]
#      core: CPU Core used in emulation. auto will switch to dynamic if available and appropriate.
#            Possible values: auto, dynamic, normal, simple.
#   cputype: CPU Type used in emulation. auto is the fastest choice.
#            Possible values: auto, 386, 386_slow, 486_slow, pentium_slow, 386_prefetch.
#    cycles: Amount of instructions DOSBox tries to emulate each millisecond.
#            Setting this value too high results in sound dropouts and lags.
#            Cycles can be set in 3 ways:
#              'auto'          tries to guess what a game needs.
#                              It usually works, but can fail for certain games.
#              'fixed #number' will set a fixed amount of cycles. This is what you usually need if 'auto' fails.
#                              (Example: fixed 4000).
#              'max'           will allocate as much cycles as your computer is able to handle.
#
#            Possible values: auto, fixed, max.
#   cycleup: Amount of cycles to decrease/increase with keycombo.(CTRL-F11/CTRL-F12)
# cycledown: Setting it lower than 100 will be a percentage.

core=auto
cputype=auto
#cycles=22000
cycles=auto
cycleup=10
cycledown=20

[mixer]
#   nosound: Enable silent mode, sound is still emulated though.
#      rate: Mixer sample rate, setting any device's rate higher than this will probably lower their sound quality.
#            Possible values: 44100, 48000, 32000, 22050, 16000, 11025, 8000, 49716.
# blocksize: Mixer block size, larger blocks might help sound stuttering but sound will also be more lagged.
#            Possible values: 1024, 2048, 4096, 8192, 512, 256.
# prebuffer: How many milliseconds of data to keep on top of the blocksize.

nosound=false
rate=44100
blocksize=1024
prebuffer=20

[midi]
#     mpu401: Type of MPU-401 to emulate.
#             Possible values: intelligent, uart, none.
# mididevice: Device that will receive the MIDI data from MPU-401.
#             Possible values: default, win32, alsa, oss, coreaudio, coremidi, none.
# midiconfig: Special configuration options for the device driver. This is usually the id of the device you want to use.
#               See the README/Manual for more details.

mpu401=intelligent
mididevice=default
midiconfig=

[sblaster]
#  sbtype: Type of Soundblaster to emulate. gb is Gameblaster.
#          Possible values: sb1, sb2, sbpro1, sbpro2, sb16, gb, none.
#  sbbase: The IO address of the soundblaster.
#          Possible values: 220, 240, 260, 280, 2a0, 2c0, 2e0, 300.
#     irq: The IRQ number of the soundblaster.
#          Possible values: 7, 5, 3, 9, 10, 11, 12.
#     dma: The DMA number of the soundblaster.
#          Possible values: 1, 5, 0, 3, 6, 7.
#    hdma: The High DMA number of the soundblaster.
#          Possible values: 1, 5, 0, 3, 6, 7.
# sbmixer: Allow the soundblaster mixer to modify the DOSBox mixer.
# oplmode: Type of OPL emulation. On 'auto' the mode is determined by sblaster type. All OPL modes are Adlib-compatible, except for 'cms'.
#          Possible values: auto, cms, opl2, dualopl2, opl3, none.
#  oplemu: Provider for the OPL emulation. compat might provide better quality (see oplrate as well).
#          Possible values: default, compat, fast.
# oplrate: Sample rate of OPL music emulation. Use 49716 for highest quality (set the mixer rate accordingly).
#          Possible values: 44100, 49716, 48000, 32000, 22050, 16000, 11025, 8000.

sbtype=sb16
sbbase=220
irq=7
dma=1
hdma=5
sbmixer=true
oplmode=auto
oplemu=default
oplrate=44100

[gus]
#      gus: Enable the Gravis Ultrasound emulation.
#  gusrate: Sample rate of Ultrasound emulation.
#           Possible values: 44100, 48000, 32000, 22050, 16000, 11025, 8000, 49716.
#  gusbase: The IO base address of the Gravis Ultrasound.
#           Possible values: 240, 220, 260, 280, 2a0, 2c0, 2e0, 300.
#   gusirq: The IRQ number of the Gravis Ultrasound.
#           Possible values: 5, 3, 7, 9, 10, 11, 12.
#   gusdma: The DMA channel of the Gravis Ultrasound.
#           Possible values: 3, 0, 1, 5, 6, 7.
# ultradir: Path to Ultrasound directory. In this directory
#           there should be a MIDI directory that contains
#           the patch files for GUS playback. Patch sets used
#           with Timidity should work fine.

gus=false
gusrate=44100
gusbase=240
gusirq=5
gusdma=3
ultradir=C:\ULTRASND

[speaker]
# pcspeaker: Enable PC-Speaker emulation.
#    pcrate: Sample rate of the PC-Speaker sound generation.
#            Possible values: 44100, 48000, 32000, 22050, 16000, 11025, 8000, 49716.
#     tandy: Enable Tandy Sound System emulation. For 'auto', emulation is present only if machine is set to 'tandy'.
#            Possible values: auto, on, off.
# tandyrate: Sample rate of the Tandy 3-Voice generation.
#            Possible values: 44100, 48000, 32000, 22050, 16000, 11025, 8000, 49716.
#    disney: Enable Disney Sound Source emulation. (Covox Voice Master and Speech Thing compatible).

pcspeaker=true
pcrate=44100
tandy=auto
tandyrate=44100
disney=true

[joystick]
# joysticktype: Type of joystick to emulate: auto (default), none,
#               2axis (supports two joysticks),
#               4axis (supports one joystick, first joystick used),
#               4axis_2 (supports one joystick, second joystick used),
#               fcs (Thrustmaster), ch (CH Flightstick).
#               none disables joystick emulation.
#               auto chooses emulation depending on real joystick(s).
#               (Remember to reset dosbox's mapperfile if you saved it earlier)
#               Possible values: auto, 2axis, 4axis, 4axis_2, fcs, ch, none.
#        timed: enable timed intervals for axis. Experiment with this option, if your joystick drifts (away).
#     autofire: continuously fires as long as you keep the button pressed.
#       swap34: swap the 3rd and the 4th axis. can be useful for certain joysticks.
#   buttonwrap: enable button wrapping at the number of emulated buttons.

joysticktype=auto
timed=true
autofire=false
swap34=false
buttonwrap=false

[serial]
# serial1: set type of device connected to com port.
#          Can be disabled, dummy, modem, nullmodem, directserial.
#          Additional parameters must be in the same line in the form of
#          parameter:value. Parameter for all types is irq (optional).
#          for directserial: realport (required), rxdelay (optional).
#                           (realport:COM1 realport:ttyS0).
#          for modem: listenport (optional).
#          for nullmodem: server, rxdelay, txdelay, telnet, usedtr,
#                         transparent, port, inhsocket (all optional).
#          Example: serial1=modem listenport:5000
#          Possible values: dummy, disabled, modem, nullmodem, directserial.
# serial2: see serial1
#          Possible values: dummy, disabled, modem, nullmodem, directserial.
# serial3: see serial1
#          Possible values: dummy, disabled, modem, nullmodem, directserial.
# serial4: see serial1
#          Possible values: dummy, disabled, modem, nullmodem, directserial.

serial1=dummy
serial2=dummy
serial3=disabled
serial4=disabled

[dos]
#            xms: Enable XMS support.
#            ems: Enable EMS support.
#            umb: Enable UMB support.
# keyboardlayout: Language code of the keyboard layout (or none).

xms=true
ems=true
umb=true
keyboardlayout=auto

[ipx]
# ipx: Enable ipx over UDP/IP emulation.

ipx=false

[autoexec]
# Lines in this section will be run at startup.
# You can put your MOUNT lines here.
mount c c:\dos
c:
-
Window x3
# This is the configurationfile for DOSBox 0.74. (Please use the latest version of DOSBox)
# Lines starting with a # are commentlines and are ignored by DOSBox.
# They are used to (briefly) document the effect of each option.

[sdl]
#       fullscreen: Start dosbox directly in fullscreen. (Press ALT-Enter to go back)
#       fulldouble: Use double buffering in fullscreen. It can reduce screen flickering, but it can also result in a slow DOSBox.
#   fullresolution: What resolution to use for fullscreen: original or fixed size (e.g. 1024x768).
#                     Using your monitor's native resolution with aspect=true might give the best results.
#                     If you end up with small window on a large screen, try an output different from surface.
# windowresolution: Scale the window to this size IF the output device supports hardware scaling.
#                     (output=surface does not!)
#           output: What video system to use for output.
#                   Possible values: surface, overlay, opengl, openglnb, ddraw.
#         autolock: Mouse will automatically lock, if you click on the screen. (Press CTRL-F10 to unlock)
#      sensitivity: Mouse sensitivity.
#      waitonerror: Wait before closing the console if dosbox has an error.
#         priority: Priority levels for dosbox. Second entry behind the comma is for when dosbox is not focused/minimized.
#                     pause is only valid for the second entry.
#                   Possible values: lowest, lower, normal, higher, highest, pause.
#       mapperfile: File used to load/save the key/event mappings from. Resetmapper only works with the defaul value.
#     usescancodes: Avoid usage of symkeys, might not work on all operating systems.

fullscreen=false
fulldouble=false
fullresolution=original
fullresolution=1280x800
windowresolution=1280x800
output=openglnb
#output=surface
autolock=true
sensitivity=100
waitonerror=true
priority=higher,normal
mapperfile=mapper-0.74.map
usescancodes=true
hwscale=2.0

[dosbox]
# language: Select another language file.
#  machine: The type of machine tries to emulate.
#           Possible values: hercules, cga, tandy, pcjr, ega, vgaonly, svga_s3, svga_et3000, svga_et4000, svga_paradise, vesa_nolfb, vesa_oldvbe.
# captures: Directory where things like wave, midi, screenshot get captured.
#  memsize: Amount of memory DOSBox has in megabytes.
#             This value is best left at its default to avoid problems with some games,
#             though few games might require a higher value.
#             There is generally no speed advantage when raising this value.

language=
machine=svga_s3
captures=capture
memsize=16

[render]
# frameskip: How many frames DOSBox skips before drawing one.
#    aspect: Do aspect correction, if your output method doesn't support scaling this can slow things down!.
#    scaler: Scaler used to enlarge/enhance low resolution modes.
#              If 'forced' is appended, then the scaler will be used even if the result might not be desired.
#            Possible values: none, normal2x, normal3x, advmame2x, advmame3x, advinterp2x, advinterp3x, hq2x, hq3x, 2xsai, super2xsai, supereagle, tv2x, tv3x, rgb2x, rgb3x, scan2x, scan3x.

frameskip=0
aspect=false
scaler=normal3x
#scaler=normal

[cpu]
#      core: CPU Core used in emulation. auto will switch to dynamic if available and appropriate.
#            Possible values: auto, dynamic, normal, simple.
#   cputype: CPU Type used in emulation. auto is the fastest choice.
#            Possible values: auto, 386, 386_slow, 486_slow, pentium_slow, 386_prefetch.
#    cycles: Amount of instructions DOSBox tries to emulate each millisecond.
#            Setting this value too high results in sound dropouts and lags.
#            Cycles can be set in 3 ways:
#              'auto'          tries to guess what a game needs.
#                              It usually works, but can fail for certain games.
#              'fixed #number' will set a fixed amount of cycles. This is what you usually need if 'auto' fails.
#                              (Example: fixed 4000).
#              'max'           will allocate as much cycles as your computer is able to handle.
#
#            Possible values: auto, fixed, max.
#   cycleup: Amount of cycles to decrease/increase with keycombo.(CTRL-F11/CTRL-F12)
# cycledown: Setting it lower than 100 will be a percentage.

core=auto
cputype=auto
#cycles=22000
cycles=auto
cycleup=10
cycledown=20

[mixer]
#   nosound: Enable silent mode, sound is still emulated though.
#      rate: Mixer sample rate, setting any device's rate higher than this will probably lower their sound quality.
#            Possible values: 44100, 48000, 32000, 22050, 16000, 11025, 8000, 49716.
# blocksize: Mixer block size, larger blocks might help sound stuttering but sound will also be more lagged.
#            Possible values: 1024, 2048, 4096, 8192, 512, 256.
# prebuffer: How many milliseconds of data to keep on top of the blocksize.

nosound=false
rate=44100
blocksize=1024
prebuffer=20

[midi]
#     mpu401: Type of MPU-401 to emulate.
#             Possible values: intelligent, uart, none.
# mididevice: Device that will receive the MIDI data from MPU-401.
#             Possible values: default, win32, alsa, oss, coreaudio, coremidi, none.
# midiconfig: Special configuration options for the device driver. This is usually the id of the device you want to use.
#               See the README/Manual for more details.

mpu401=intelligent
mididevice=default
midiconfig=

[sblaster]
#  sbtype: Type of Soundblaster to emulate. gb is Gameblaster.
#          Possible values: sb1, sb2, sbpro1, sbpro2, sb16, gb, none.
#  sbbase: The IO address of the soundblaster.
#          Possible values: 220, 240, 260, 280, 2a0, 2c0, 2e0, 300.
#     irq: The IRQ number of the soundblaster.
#          Possible values: 7, 5, 3, 9, 10, 11, 12.
#     dma: The DMA number of the soundblaster.
#          Possible values: 1, 5, 0, 3, 6, 7.
#    hdma: The High DMA number of the soundblaster.
#          Possible values: 1, 5, 0, 3, 6, 7.
# sbmixer: Allow the soundblaster mixer to modify the DOSBox mixer.
# oplmode: Type of OPL emulation. On 'auto' the mode is determined by sblaster type. All OPL modes are Adlib-compatible, except for 'cms'.
#          Possible values: auto, cms, opl2, dualopl2, opl3, none.
#  oplemu: Provider for the OPL emulation. compat might provide better quality (see oplrate as well).
#          Possible values: default, compat, fast.
# oplrate: Sample rate of OPL music emulation. Use 49716 for highest quality (set the mixer rate accordingly).
#          Possible values: 44100, 49716, 48000, 32000, 22050, 16000, 11025, 8000.

sbtype=sb16
sbbase=220
irq=7
dma=1
hdma=5
sbmixer=true
oplmode=auto
oplemu=default
oplrate=44100

[gus]
#      gus: Enable the Gravis Ultrasound emulation.
#  gusrate: Sample rate of Ultrasound emulation.
#           Possible values: 44100, 48000, 32000, 22050, 16000, 11025, 8000, 49716.
#  gusbase: The IO base address of the Gravis Ultrasound.
#           Possible values: 240, 220, 260, 280, 2a0, 2c0, 2e0, 300.
#   gusirq: The IRQ number of the Gravis Ultrasound.
#           Possible values: 5, 3, 7, 9, 10, 11, 12.
#   gusdma: The DMA channel of the Gravis Ultrasound.
#           Possible values: 3, 0, 1, 5, 6, 7.
# ultradir: Path to Ultrasound directory. In this directory
#           there should be a MIDI directory that contains
#           the patch files for GUS playback. Patch sets used
#           with Timidity should work fine.

gus=false
gusrate=44100
gusbase=240
gusirq=5
gusdma=3
ultradir=C:\ULTRASND

[speaker]
# pcspeaker: Enable PC-Speaker emulation.
#    pcrate: Sample rate of the PC-Speaker sound generation.
#            Possible values: 44100, 48000, 32000, 22050, 16000, 11025, 8000, 49716.
#     tandy: Enable Tandy Sound System emulation. For 'auto', emulation is present only if machine is set to 'tandy'.
#            Possible values: auto, on, off.
# tandyrate: Sample rate of the Tandy 3-Voice generation.
#            Possible values: 44100, 48000, 32000, 22050, 16000, 11025, 8000, 49716.
#    disney: Enable Disney Sound Source emulation. (Covox Voice Master and Speech Thing compatible).

pcspeaker=true
pcrate=44100
tandy=auto
tandyrate=44100
disney=true

[joystick]
# joysticktype: Type of joystick to emulate: auto (default), none,
#               2axis (supports two joysticks),
#               4axis (supports one joystick, first joystick used),
#               4axis_2 (supports one joystick, second joystick used),
#               fcs (Thrustmaster), ch (CH Flightstick).
#               none disables joystick emulation.
#               auto chooses emulation depending on real joystick(s).
#               (Remember to reset dosbox's mapperfile if you saved it earlier)
#               Possible values: auto, 2axis, 4axis, 4axis_2, fcs, ch, none.
#        timed: enable timed intervals for axis. Experiment with this option, if your joystick drifts (away).
#     autofire: continuously fires as long as you keep the button pressed.
#       swap34: swap the 3rd and the 4th axis. can be useful for certain joysticks.
#   buttonwrap: enable button wrapping at the number of emulated buttons.

joysticktype=auto
timed=true
autofire=false
swap34=false
buttonwrap=false

[serial]
# serial1: set type of device connected to com port.
#          Can be disabled, dummy, modem, nullmodem, directserial.
#          Additional parameters must be in the same line in the form of
#          parameter:value. Parameter for all types is irq (optional).
#          for directserial: realport (required), rxdelay (optional).
#                           (realport:COM1 realport:ttyS0).
#          for modem: listenport (optional).
#          for nullmodem: server, rxdelay, txdelay, telnet, usedtr,
#                         transparent, port, inhsocket (all optional).
#          Example: serial1=modem listenport:5000
#          Possible values: dummy, disabled, modem, nullmodem, directserial.
# serial2: see serial1
#          Possible values: dummy, disabled, modem, nullmodem, directserial.
# serial3: see serial1
#          Possible values: dummy, disabled, modem, nullmodem, directserial.
# serial4: see serial1
#          Possible values: dummy, disabled, modem, nullmodem, directserial.

serial1=dummy
serial2=dummy
serial3=disabled
serial4=disabled

[dos]
#            xms: Enable XMS support.
#            ems: Enable EMS support.
#            umb: Enable UMB support.
# keyboardlayout: Language code of the keyboard layout (or none).

xms=true
ems=true
umb=true
keyboardlayout=auto

[ipx]
# ipx: Enable ipx over UDP/IP emulation.

ipx=false

[autoexec]
# Lines in this section will be run at startup.
# You can put your MOUNT lines here.
mount c c:\dos
c:
Режимы видео
Для переключения между полноэкранным и оконным режимом используйте комбинацию клавиш Atl+Enter.
Полноэкранный режим по умолчанию
Чтобы DOSBox запускался по умолчанию на полный экран, используйте настройки конфигурации:
fullscreen=true
output=surface
Пример секции [sdl] для полноэкранного режима:
fullscreen=true
fulldouble=false
fullresolution=original
windowresolution=1280x800
output=surface
autolock=true
sensitivity=100
waitonerror=true
priority=higher,normal
mapperfile=mapper-0.74.map
usescancodes=true
Оконный режим по умолчанию
Современные мониторы обладают большим разрешением. Поэтому DOSBox по умолчанию увеличивает разрешение DOS игры в два раза. Из 320x200 получается 640x400. Этого может быть недостаточно. Сначала установите оконный режим.
Пример секции [sdl] для оконного режима.
fullscreen=false
fulldouble=false
fullresolution=original
fullresolution=1280x800
windowresolution=1280x800
output=openglnb
#output=surface
autolock=true
sensitivity=100
waitonerror=true
priority=higher,normal
mapperfile=mapper-0.74.map
usescancodes=true
Затем настройте трёхкратное масштабирование.
Пример секции [render] для оконного режима с трёхкратным увеличением начального разрешения:
frameskip=0
aspect=false
scaler=normal3
Эти настройки позволят запускать DOSBox в оконном режиме с разрешением 960x600.
Такты
Такты или Cycles — это количество наборов инструкций, которые DOSBox пытается эмулировать каждую миллисекунду. Чем больше тактов, тем быстрее работает DOS игра. Чем быстрее работает ваш процессор, тем сильнее нужно снизить такты, чтобы добиться нормальной скорости работы игры.
- Ctrl+F11 — замедлить игру
- Ctrl+F12 — ускорить игру
Задать такты можно в командной строке:
cycles value
Где value:
- auto — DOSBox сам определит оптимальное значение
- max — ускорить до максимума
- # — сами установите своё значение
Если игра слишком быстрая, установите такты поменьше, к примеру:
cycles 300
Если игра слишком медленная, установите такты побольше, к примеру:
cycles 20000
Когда вы определите оптимальное для себя значение тактов, укажите его в файле конфигурации:
cycles=500
Autoexec
Autoexec — секция в самом конце конфигурационного файла, названная в честь файла autoexec.bat. Команды в этой секции будут выполняться при старте DOSBox. Самое нужное место, для того чтобы прописать здесь команды для монтирования ваших папок с играми.
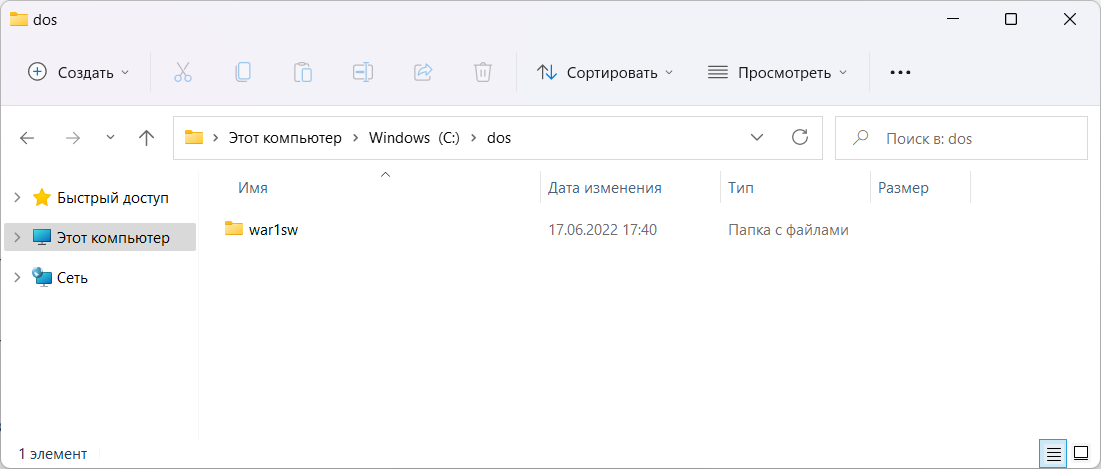
Создадим на компьютере папку:
C:\dos
Разместим в ней папки с DOS играми:
Пример секции [autoexec]:
mount c c:\dos\
c:
Первая строка монтирует папку C:\dos в качестве DOS диска C: в DOSBox. Если ваши игры находятся в другой папке, укажите свою. Вторая команда устанавливает диск C:.
Не монтируйте системный диск C: в качестве папки с DOS играми, это может быть небезопасно!
Можно прописать запуск при старте DOSBox своей любимой игры.
Установка игры
Некоторые игры перед запуском требуют установки или настройки. Скачиваемые с этого сайта архивы игр не требуют установки и готовы к запуску, но я мог что-то упустить. Некоторые игры могут потребовать запуск отдельной программы установки перед началом игры. Поищите файл установки или настройки, если игра не хочет нормально запускаться или работает без звука.
- SETUP.EXE
- CONFIG.EXE
- SETSOUND.EXE
- и другие
При настройке звука в DOSBox по умолчанию используются:
- SoundBlaster или SoundBlaster 2.0
- Address: 220
- Interrupt: 7
- DMA: 1
Запуск игры
Запускаем DOSBox.
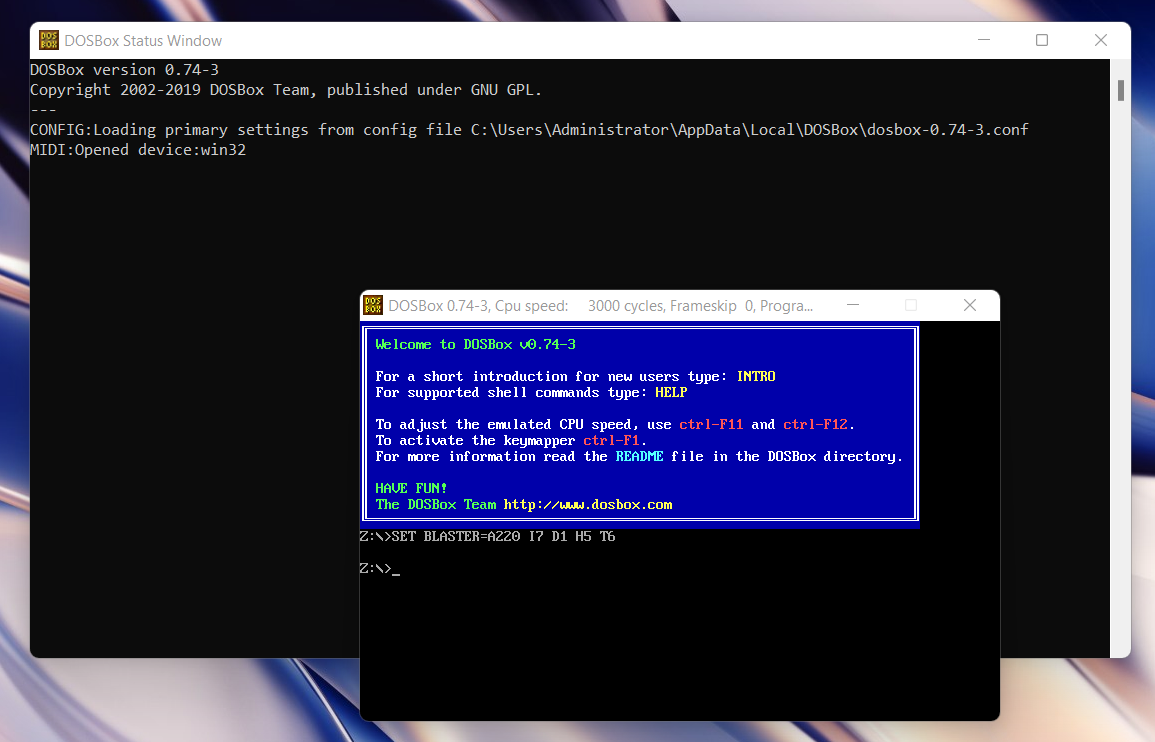
Открываются два окна:
- DOSBox Status Window — консольное окно
- DOSBox — Окно с DOS
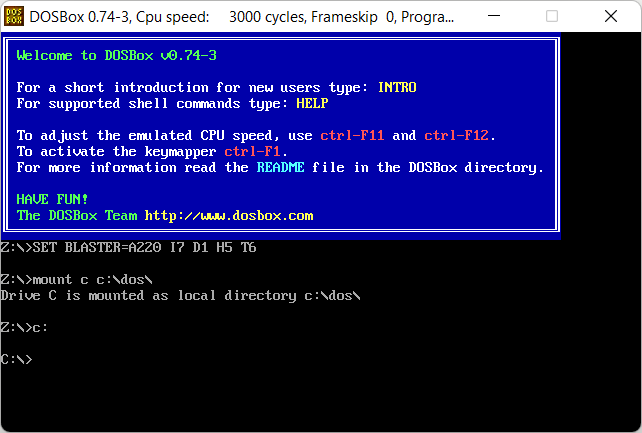
Я запустил DOSBox с начальными настройками, поэтому буду монтировать диск с играми самостоятельно.
Монтирую папку с играми и перехожу к диску C:
mount c c:\dos\
c:
Команды DOS
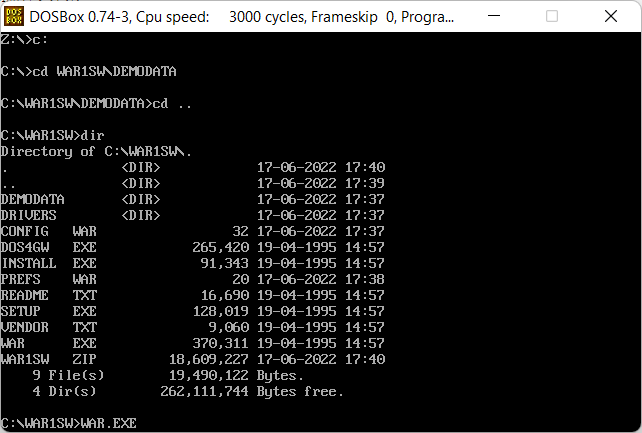
Давайте вспомним базовые команды DOS, которые нам могут пригодиться для запуска игр.
- [диск]: — смена диска
Если у вас примонтированы несколько дисков, то можно переключаться между ними:
c:
d:
x:
- cd [путь] — change directory, сменить директорию
c:
cd WAR1SW\DEMODATA
Вы можете начать писать название директории и нажать TAB, DOSBox допишет.
- cd .. — на уровень вверх
cd ..
- dir — содержимое директории
dir
- FILE.EXT — выполнить файл
WAR.EXE
Пример запуска игры
c:
cd WAR1SW
dir
WAR.EXE
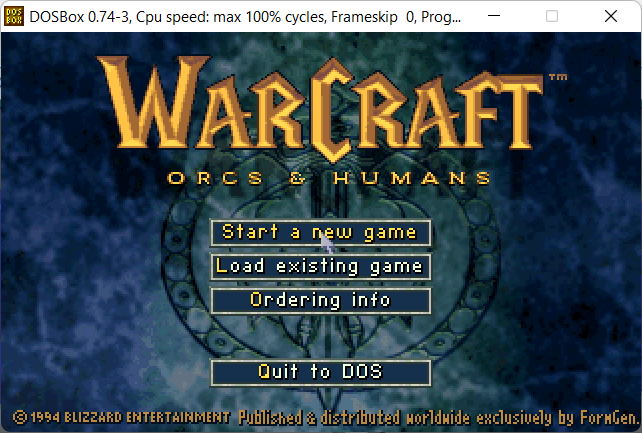
Игра!
Игра запустится.
Горячие клавиши
Во время игры можно использовать горячие клавиши.
- Alt+Enter — переключение между оконным и полноэкранным режимом
- Alt+Pause — пауза (Alt+F16 в OSX)
- Ctrl+F1 — биндинг клавиш
- Ctrl+F4 — обновить кэш смонтированных директорий
- Ctrl+F5 — снимок экрана
- Ctrl+Alt+F5 — Start/Stop записи AVI видео
- Ctrl+F6 — Start/Stop записи WAV звука
- Ctrl+Alt+F7 — Start/Stop записи OPL команд
- Ctrl+Alt+F8 — Start/Stop записи MIDI команд
- Ctrl+F7 — уменьшить пропуск кадров
- Ctrl+F8 — увеличить пропуск кадров
- Ctrl+F9 — kill (закрыть) DOSBox
- Ctrl+F10 — разблокировать мышь
- Ctrl+F11 — замедлить игру
- Ctrl+F12 — ускорить игру
- Alt+F12 — TURBO
- Ctrl+Alt+F2 — смена раскладки
- Left_Alt+Right_Shift — активация двойной раскладки (GK codepage 869 и RU codepage 808)
- Left_Alt+Left_Shift — деактивация двойной раскладки
Папку со скриншотами и видео можно открыть, выполнив Screenshots & Recordings.bat, или открыть папку:
C:\Users\%username%\AppData\Local\DOSBox\capture
Поиск и исправление ошибок
Что делать, если игра не запускается?
Проверьте, есть ли игра в списке совместимости DOSBox. Некоторые игры пока не запускаются в DOSBox.
Читайте DOSBox FAQ.
Читать форумы:
https://www.vogons.org/viewforum.php?f=31
https://dosgames.com/forum/forum-3.html
И Wiki:
https://www.old-games.ru/wiki/DOSBox_в_вопросах_и_ответах
Инструкция на английском: