Seafile — это личное облачное хранилище для хранения данных в стиле Dropbox.
Сегодня мы установим Seafile 9.0.7 на Ubuntu 20.
- Имеется сервер с операционной системой Ubuntu 20. Вернее мы его создадим на VMware, виртуальный.
- Seafile для безопасности запустим под отдельным пользователем как службы.
- В качестве БД используем MySQL 8 на том же сервере.
- Дополнительно поднимем и настроим Nginx.
Доступна версия 9.0.7 64bit.
https://www.seafile.com/en/download/
Ссылки
Ранее я уже публиковал статьи про установку Seafile:
Seafile 9.0.2 — установка на Debian 11
Seafile 7.1.1 — установка на Ubuntu 18.04 LTS
Seafile — установка на Ubuntu 18.04 LTS
Мануал:
Подготовка сервера
Подготовим сервер с операционной системой Ubuntu 20.04 LTS:
Ubuntu Server 20 — установка на виртуальную машину VMware
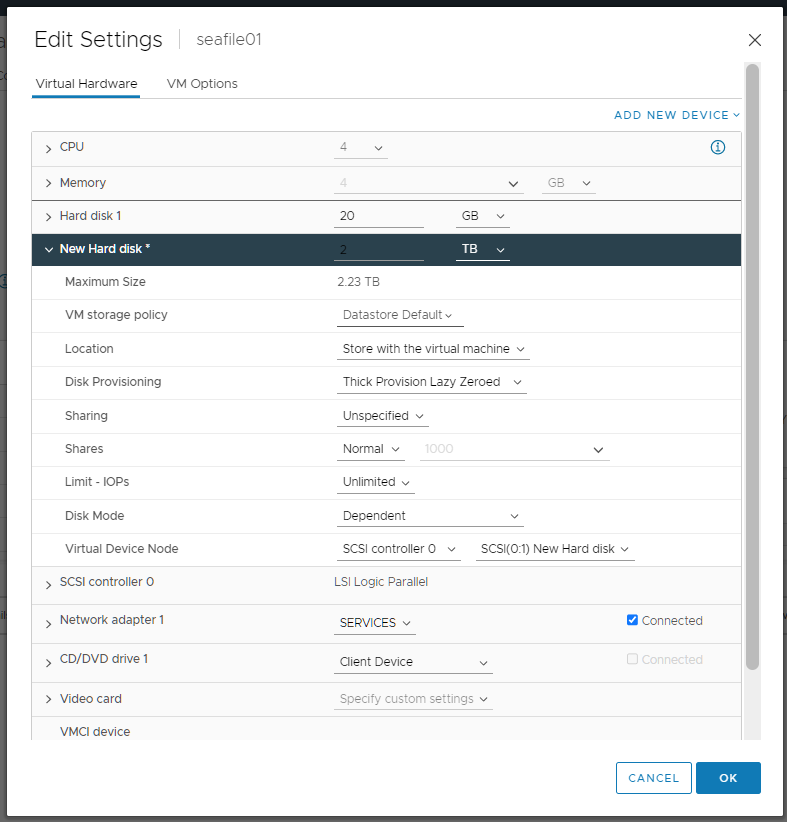
Seafile отличается низкими требованиями к ресурсам, поэтому выделяем 4 CPU и 4 Гб оперативной памяти. Жёсткий диск под систему: 20 Гб. Для хранения файлов личного хранилища я собираюсь использовать отдельный диск. Подключаем новый диск к виртуальному серверу:
VMware - подключение нового диска в ubuntu
Я собираюсь добавить толстый диск объёмом 2 ТБ. В свойствах виртуалки New Hard disk.
OK. Перезагружаем сервер:
sudo reboot
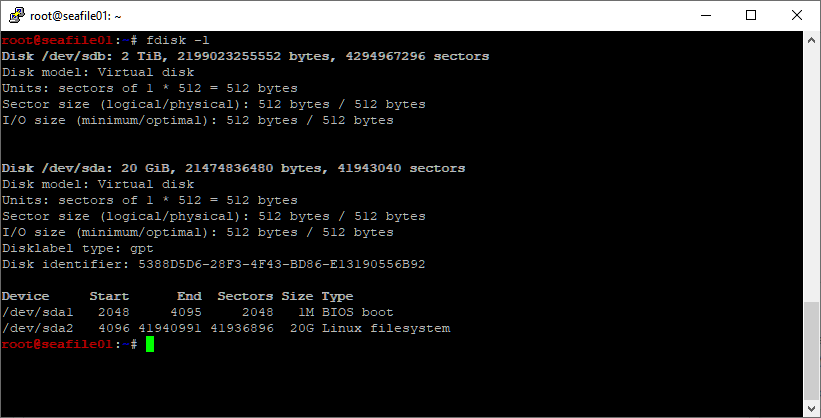
Работаем под рутом. После перезагрузки проверяем, что диск увиделся:
fdisk -l
У нас появился новый диск Disk /dev/sdb: 2 TiB.
Создаём основной раздел на диске:
fdisk /dev/sdb
Пример:
root@seafile01:~# fdisk /dev/sdb

Welcome to fdisk (util-linux 2.34).
Changes will remain in memory only, until you decide to write them.
Be careful before using the write command.

Device does not contain a recognized partition table.
The size of this disk is 2 TiB (2199023255552 bytes). DOS partition table format cannot be used on drives for volumes larger than 2199023255040 bytes for 512-byte sectors. Use GUID partition table format (GPT).

Created a new DOS disklabel with disk identifier 0xcc9a052f.

Command (m for help): g
Created a new GPT disklabel (GUID: 7D20EEAE-D230-BC48-900D-F7B6785B6F49).

Command (m for help): n
Partition number (1-128, default 1):
First sector (2048-4294967262, default 2048):
Last sector, +/-sectors or +/-size{K,M,G,T,P} (2048-4294967262, default 4294967262):

Created a new partition 1 of type 'Linux filesystem' and of size 2 TiB.

Command (m for help): w
The partition table has been altered.
Calling ioctl() to re-read partition table.
Syncing disks.
Проверяем:
fdisk /dev/sdb
p
root@seafile01:~# fdisk /dev/sdb

Welcome to fdisk (util-linux 2.34).
Changes will remain in memory only, until you decide to write them.
Be careful before using the write command.


Command (m for help): p
Disk /dev/sdb: 2 TiB, 2199023255552 bytes, 4294967296 sectors
Disk model: Virtual disk
Units: sectors of 1 * 512 = 512 bytes
Sector size (logical/physical): 512 bytes / 512 bytes
I/O size (minimum/optimal): 512 bytes / 512 bytes
Disklabel type: gpt
Disk identifier: 7D20EEAE-D230-BC48-900D-F7B6785B6F49

Device     Start        End    Sectors Size Type
/dev/sdb1   2048 4294967262 4294965215   2T Linux filesystem

Command (m for help): q
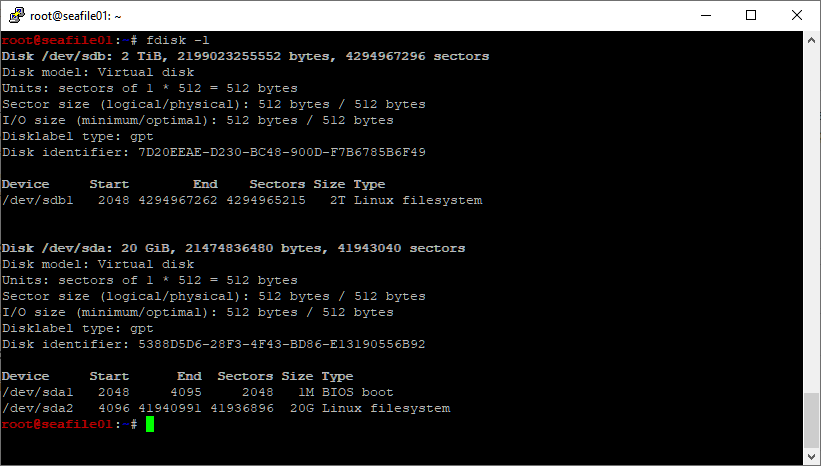
fdisk -l
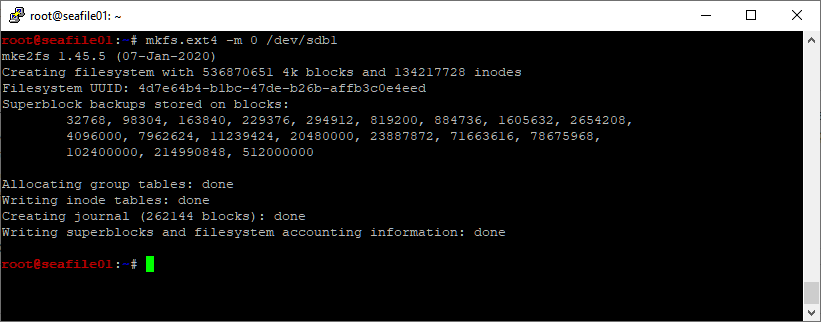
На диске появился раздел /dev/sdb1. В разделе /dev/sdb1 нужно создать файловую систему:
mkfs.ext4 -m 0 /dev/sdb1
Примонтируем /dev/sdb1 в /u01. В папке u01 будет лежать всё, что касается Seafile. Создадим что /u01 существует:
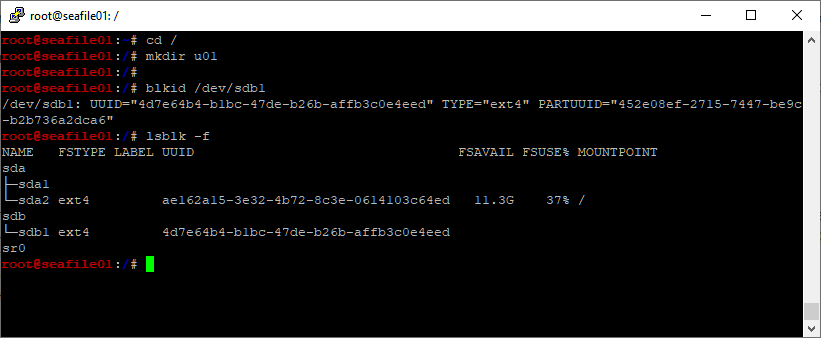
cd /
mkdir u01
Узнаем UUID раздела /dev/sdb1.
blkid /dev/sdb1
или
lsblk -f
UUID="4d7e64b4-b1bc-47de-b26b-affb3c0e4eed"
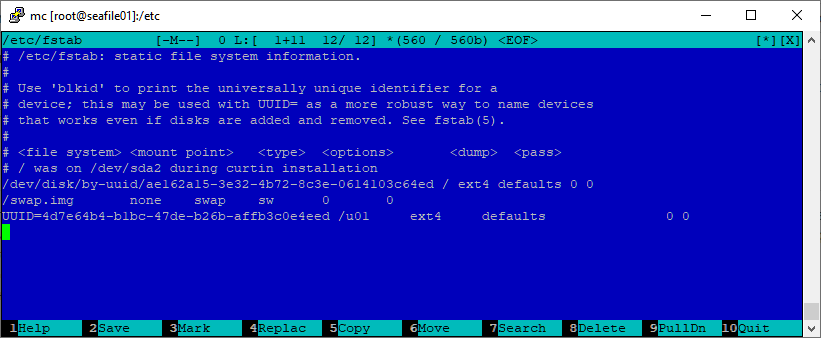
Добавим строку в /etc/fstab:
UUID=4d7e64b4-b1bc-47de-b26b-affb3c0e4eed /u01 ext4 defaults 0 0
Монтируем раздел:
sudo mount -a
Проверяем:
df -h
Видим что /dev/sdb1 примонтирован в /opt и имеет 2.0T свободного места. Теперь после перезагрузки раздел будет монтироваться автоматически.
Сервер подготовлен.
База данных MySQL 8 для Seafile
Установим MySQL 8. Процесс установки вынес в отдельную статью:
Установка MySQL 8 на Ubuntu 20.04 LTS
Создадим директорию /u01/mysql и перенесём туда каталог данных MySQL:
Перемещение базы данных MySQL 8 в Ubuntu 20.04 LTS
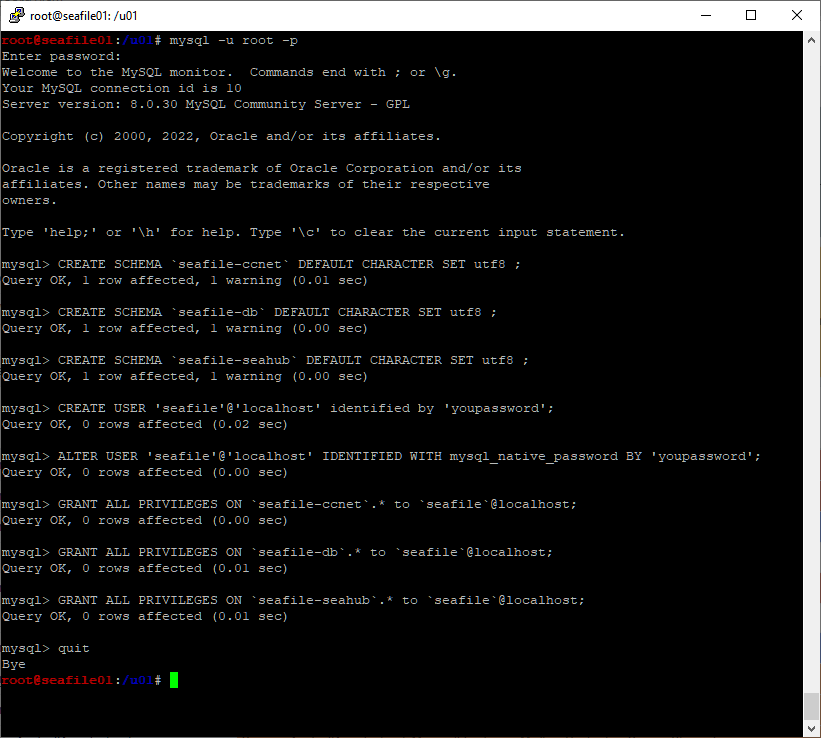
Для работы Seafile потребуется создать три базы данных.
mysql -u root -p
CREATE SCHEMA `seafile-ccnet` DEFAULT CHARACTER SET utf8 ;
CREATE SCHEMA `seafile-db` DEFAULT CHARACTER SET utf8 ;
CREATE SCHEMA `seafile-seahub` DEFAULT CHARACTER SET utf8 ;
CREATE USER 'seafile'@'localhost' identified by 'youpassword';
ALTER USER 'seafile'@'localhost' IDENTIFIED WITH mysql_native_password BY 'youpassword';
GRANT ALL PRIVILEGES ON `seafile-ccnet`.* to `seafile`@localhost;
GRANT ALL PRIVILEGES ON `seafile-db`.* to `seafile`@localhost;
GRANT ALL PRIVILEGES ON `seafile-seahub`.* to `seafile`@localhost;
Установка пакетов
Устанавливаем пакеты, хочу обратить внимание на пакет python3-dev, который в официальном мануале не указан и lxml, который был вынесен из пакета seafile из-за проблем совместимости (работаем под ROOT):
sudo apt-get update
sudo apt-get install -y python3 python3-dev python3-setuptools python3-pip libmysqlclient-dev
sudo apt-get install -y memcached libmemcached-dev

sudo pip3 install --timeout=3600 django==3.2.* Pillow pylibmc captcha jinja2 sqlalchemy==1.4.3 \
    django-pylibmc django-simple-captcha python3-ldap mysqlclient pycryptodome==3.12.0 cffi==1.14.0 lxml
Создание директории и пользователя
Для Seafile создадим директорию /u01/seafile:
cd /u01
mkdir seafile
ll
Видим, что права на папку seafile есть у пользователя root, нехорошо.
Работаем под рутом. Создадим пользователя в Ubuntu, под которым будет работать Seafile. Назовём его sf. Дадим ему права на /u01/seafile.
useradd -m -s /bin/bash sf
cd /
chown -R sf\: ./u01/seafile/
cd /u01
ls -fla | grep seafile
Теперь права на папку /u01/seafile/ принадлежат пользователю sf.
Установка Seafile Server
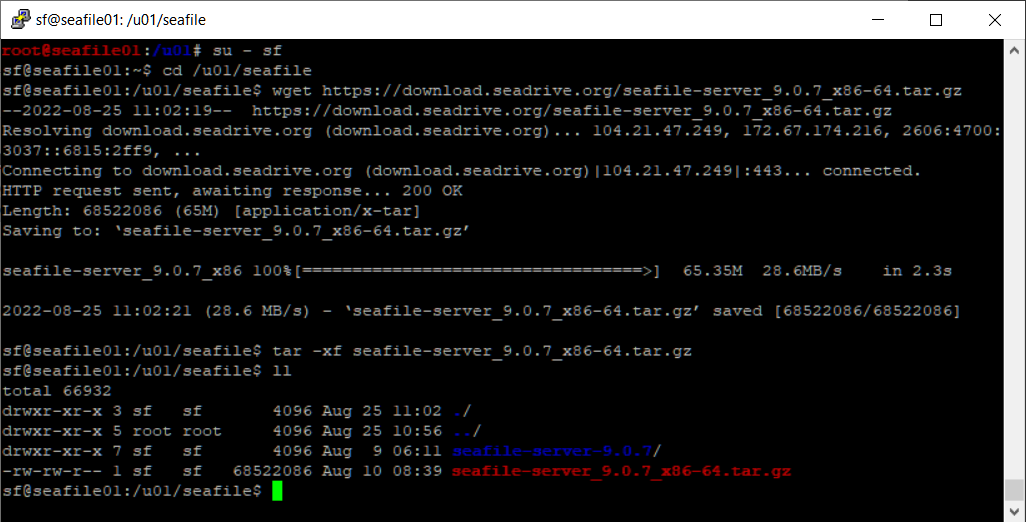
Работаем под пользователем sf. Скачиваем и распаковываем Seafile Server для Linux. На текущий момент доступна версия Server for generic Linux 9.0.7 64bit.
https://www.seafile.com/en/download/
su - sf
cd /u01/seafile
wget https://download.seadrive.org/seafile-server_9.0.7_x86-64.tar.gz
tar -xf seafile-server_9.0.7_x86-64.tar.gz
ll
Работаем под пользователем sf. Запускаем скрипт установки Seafile Server для MySQL:
cd /u01/seafile/seafile-server-9.0.7/
./setup-seafile-mysql.sh
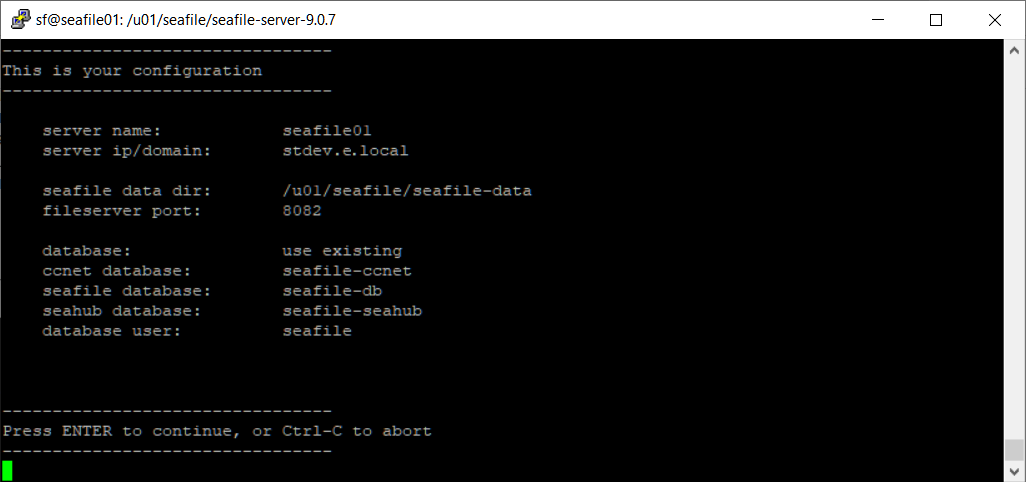
Запускается мастер установки. В процессе установки нам зададут вопросы, отвечаем на них, у вас будут собственные ответы:
- What is the name of the server? It will be displayed on the client. Пишу имя хоста — seafile01.
- What is the ip or domain of the server? Пишу будущее доменное имя — stdev.e.local.
- Where do you want to put your seafile data? Определяемся, где хранить данные. У меня всё в папке /u01/seafile, путь по умолчанию будет /u01/seafile/seafile-data, меня это устраивает.
- Which port do you want to use for the seafile fileserver? Порт по умолчанию 8082 — устраивает.
- Please choose a way to initialize seafile databases:
[1] Create new ccnet/seafile/seahub databases
[2] Use existing ccnet/seafile/seahub databases
Я уже создал все БД, указываю 2. - What is the host of mysql server? По умолчанию сервер БД localhost — localhost.
- From which hosts could the mysql account be used? По умолчанию %.
- What is the port of mysql server? Порт по умолчанию 3306, меня устраивает.
- Which mysql user to use for seafile? Указываем имя пользователя MySQL. Я пишу seafile.
- What is the password for mysql user "seafile"? Указываем пароль от пользователя MySQL.
- Enter the existing database name for ccnet: Пишу seafile-ccnet.
- Enter the existing database name for seafile: Пишу seafile-db.
- Enter the existing database name for seahub: Пишу seafile-seahub.
Проверяем настройки. Нажимаем Enter. Начинается установка Seafile Server.
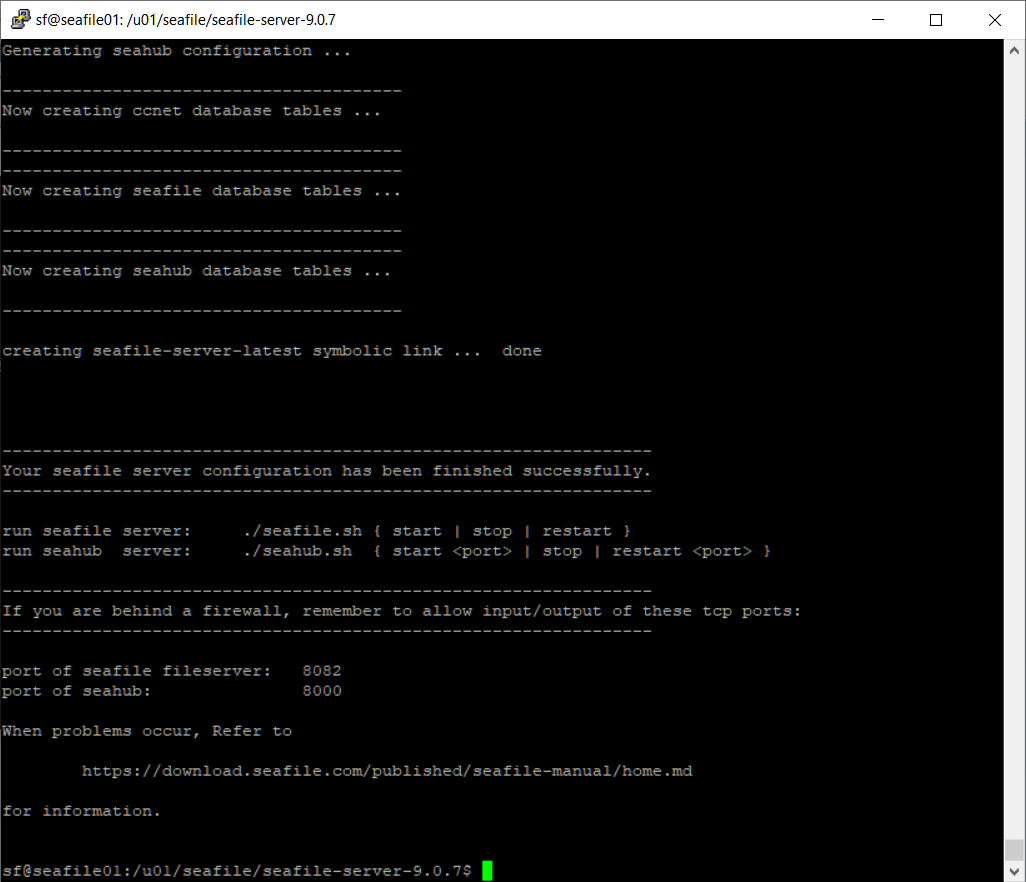
Готово. В папке /u01/seafile/ создаётся ссылка seafile-server-latest на директорию с текущей версией seafile.
Работаем под пользователем sf. Пробуем запустить seafile:
cd /u01/seafile/seafile-server-latest/
./seafile.sh start
Пробуем запустить seahub:
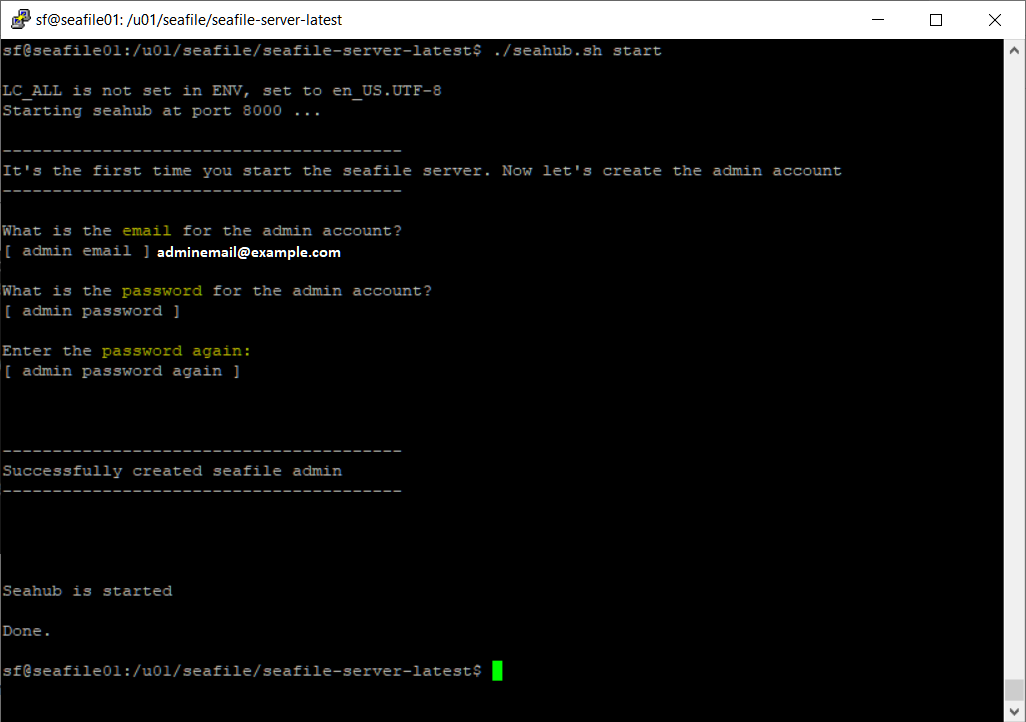
./seahub.sh start
При первом запуске нас попросят создать админа для seafile, укажите email и пароль.
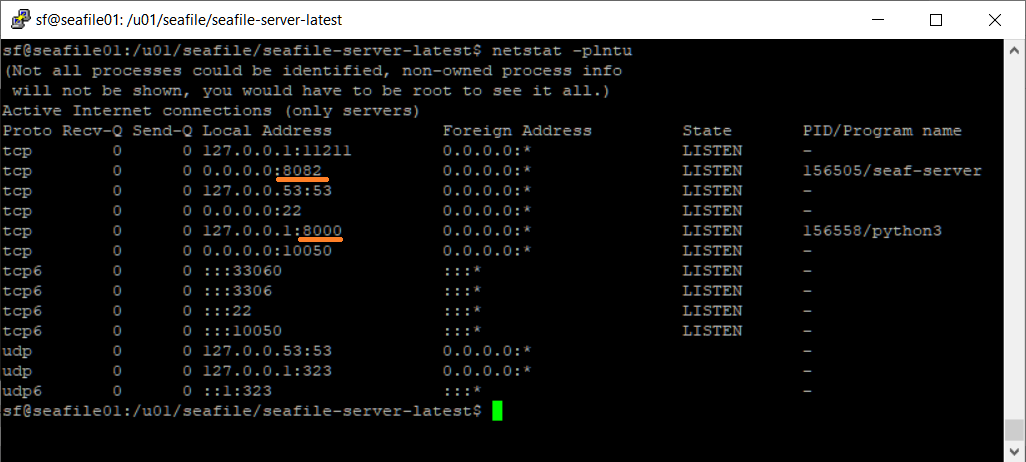
Проверим, что сервисы seafile и seahub работают и используют порты 8000 и 8082:
netstat -plntu
Останавливаем сервисы:
./seafile.sh stop
./seahub.sh stop
Установка и настройка Nginx
Работаем под рутом. Устанавливаем пакет:
sudo apt install nginx -y
Запускаем сервис nginx и добавляем его в автозагрузку:
systemctl start nginx
systemctl enable nginx
Создаём конфигурационный файл:
cd /etc/nginx/
vim sites-available/seafile
Содержимое конфигурационного файла:
-
seafile
server {
    listen       81;
    server_name  _;
    rewrite ^ https://$http_host$request_uri? permanent;        # force redirect http to https
    # Enables or disables emitting nginx version on error pages and in the "Server" response header field.
    server_tokens off;
}

server {
        listen 80;
        server_name _;

        #ssl on;
        #ssl_certificate /etc/nginx/ssl/seafile-cert.pem;        # path to your cacert.pem
        #ssl_certificate_key /etc/nginx/ssl/seafile-key.pem;     # path to your privkey.pem

        server_tokens off;
        proxy_set_header X-Forwarded-For $remote_addr;

        location / {
            proxy_pass         http://127.0.0.1:8000;
            proxy_set_header   Host $host;
            proxy_set_header   X-Real-IP $remote_addr;
            proxy_set_header   X-Forwarded-For $proxy_add_x_forwarded_for;
            proxy_set_header   X-Forwarded-Host $server_name;
            proxy_read_timeout  1200s;

            # used for view/edit office file via Office Online Server
            client_max_body_size 0;

            access_log      /var/log/nginx/seahub.access.log;
            error_log       /var/log/nginx/seahub.error.log;
        }

        location /seafhttp {
            rewrite ^/seafhttp(.*)$ $1 break;
            proxy_pass http://127.0.0.1:8082;
            client_max_body_size 0;
            proxy_set_header   X-Forwarded-For $proxy_add_x_forwarded_for;
            proxy_connect_timeout  36000s;
            proxy_read_timeout  36000s;
            proxy_send_timeout  36000s;
            send_timeout  36000s;
        }

        location /media {
            root /u01/seafile/seafile-server-latest/seahub;
        }

        location /seafdav {
            proxy_pass         http://127.0.0.1:8080/seafdav;
            proxy_set_header   Host $host;
            proxy_set_header   X-Real-IP $remote_addr;
            proxy_set_header   X-Forwarded-For $proxy_add_x_forwarded_for;
            proxy_set_header   X-Forwarded-Host $server_name;
            proxy_set_header   X-Forwarded-Proto $scheme;
            client_max_body_size 0;
            access_log      /var/log/nginx/seafdav.access.log;
            error_log       /var/log/nginx/seafdav.error.log;

            proxy_connect_timeout  36000s;
            proxy_read_timeout  36000s;
            proxy_send_timeout  36000s;
            send_timeout  36000s;

            # This option is only available for Nginx >= 1.8.0. See more details below.
            proxy_request_buffering off;

        }
    }
Конфигурация уже подготовлена для HTTPS, добавить потом сертификаты и поменять порты.
Применяем конфигурацию:
rm -f /etc/nginx/sites-enabled/default
ln -s /etc/nginx/sites-available/seafile /etc/nginx/sites-enabled/
nginx -t
systemctl restart nginx
Настройка Seafile Server
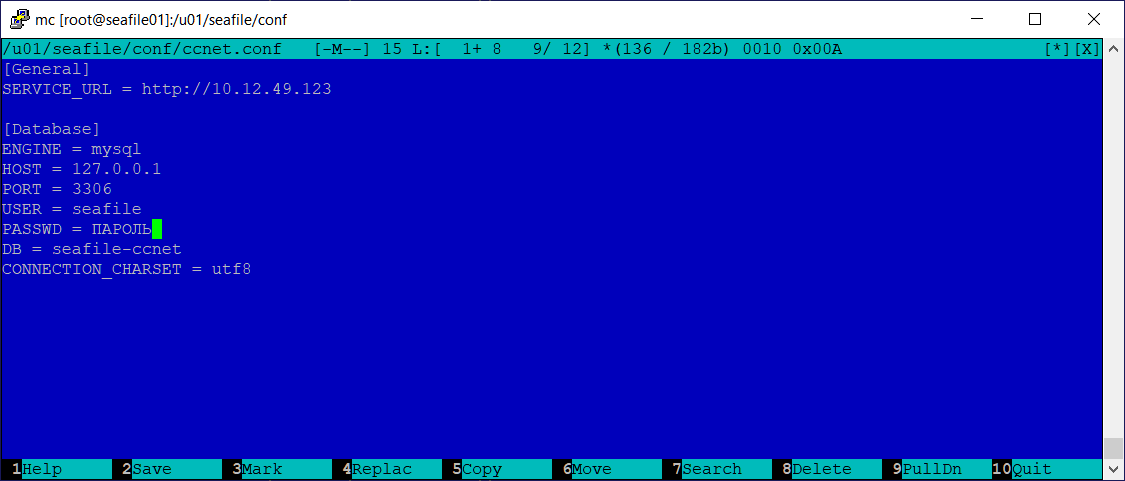
Работаем под пользователем sf. Настраиваем ccnet.conf. https://manual.seafile.com/config/ccnet-conf/
su - sf
cd /u01/seafile/conf/
vim ccnet.conf
Вносим изменения, указываем внешний URL нашего домашнего облака. Временное указываем локальный HTTP URL, потом отдельно будем менять на HTTPS, но позже:
[General]
SERVICE_URL = http://10.12.49.123/

[Database]
ENGINE = mysql
HOST = 127.0.0.1
PORT = 3306
USER = seafile
PASSWD = ПАРОЛЬ
DB = seafile-ccnet
CONNECTION_CHARSET = utf8
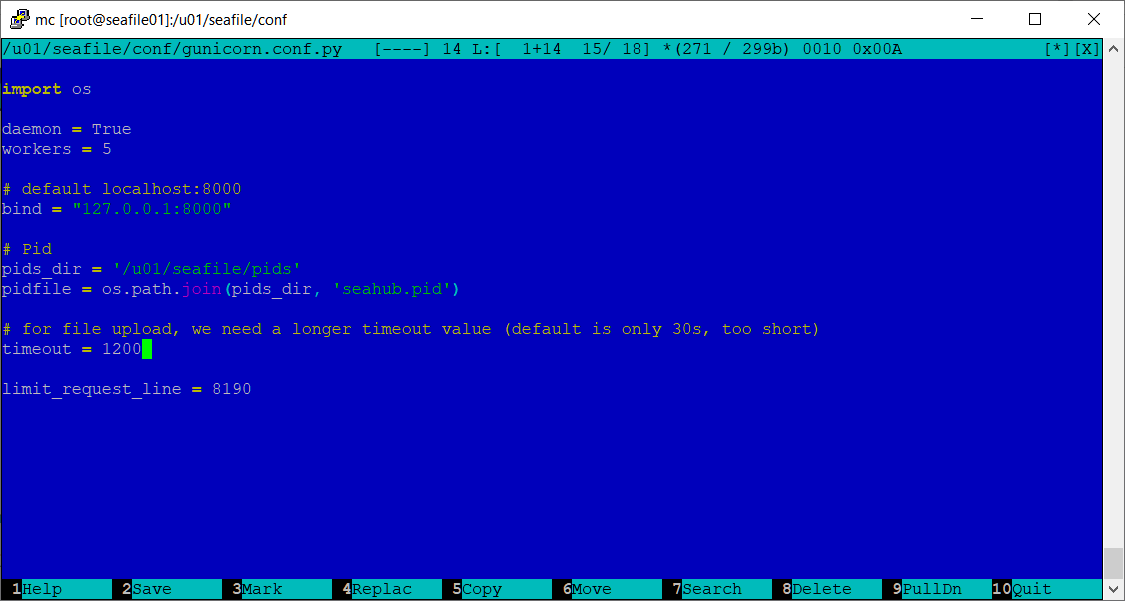
Настраиваем gunicorn.conf.py.
vim gunicorn.conf.py
Вносить изменения мне не пришлось:
import os

daemon = True
workers = 5

# default localhost:8000
bind = "127.0.0.1:8000"

# Pid
pids_dir = '/u01/seafile/pids'
pidfile = os.path.join(pids_dir, 'seahub.pid')

# for file upload, we need a longer timeout value (default is only 30s, too short)
timeout = 1200

limit_request_line = 8190
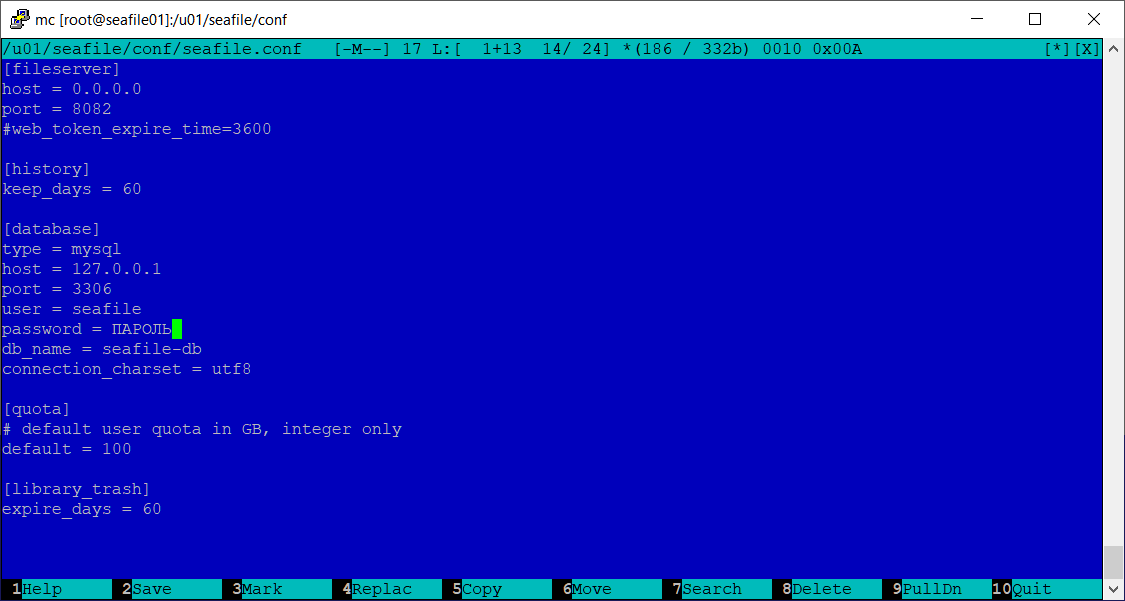
Настраиваем seafile.conf. https://manual.seafile.com/config/seafile-conf/
vim seafile.conf
Вносим изменения, я указываю срок хранения удалённых данных 60 дней, квоту в 100 ГБ на пользователя:
[fileserver]
host = 0.0.0.0
port = 8082
#web_token_expire_time=3600

[history]
keep_days = 60

[database]
type = mysql
host = 127.0.0.1
port = 3306
user = seafile
password = ПАРОЛЬ
db_name = seafile-db
connection_charset = utf8

[quota]
# default user quota in GB, integer only
default = 100

[library_trash]
expire_days = 60
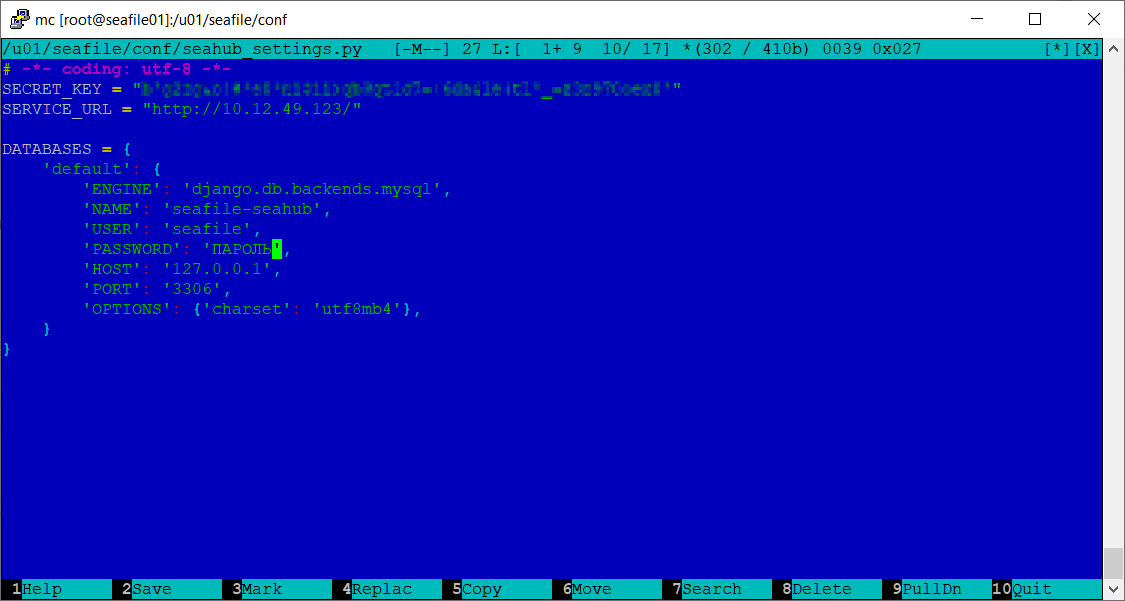
Настраиваем seahub_settings.py:
vim seahub_settings.py
Вносим изменения:
# -*- coding: utf-8 -*-
SECRET_KEY = "b'СЕКРЕТНЫЙСГЕНЕРИРОВАННЫЙКЛЮЧ'"
SERVICE_URL = "http://10.12.49.123/"

DATABASES = {
    'default': {
        'ENGINE': 'django.db.backends.mysql',
        'NAME': 'seafile-seahub',
        'USER': 'seafile',
        'PASSWORD': 'ПАРОЛЬ',
        'HOST': '127.0.0.1',
        'PORT': '3306',
        'OPTIONS': {'charset': 'utf8mb4'},
    }
}
Проверяем
su - sf
/u01/seafile/seafile-server-latest/seafile.sh start
/u01/seafile/seafile-server-latest/seahub.sh start
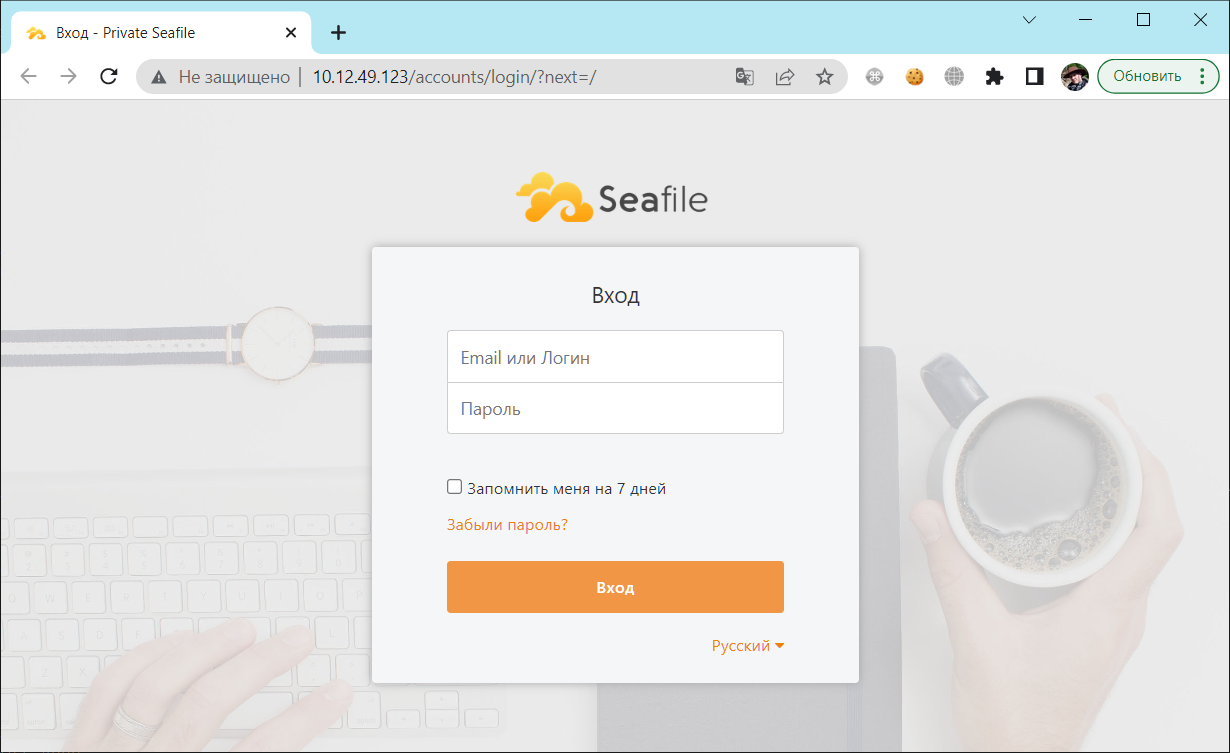
Заходим на сервер по IP адресу сервера http://10.12.49.123.
Система работает. Остались тонкости.


